SpringCloudAlibaba入门
一、使用IDEA搭建一个分布式的项目
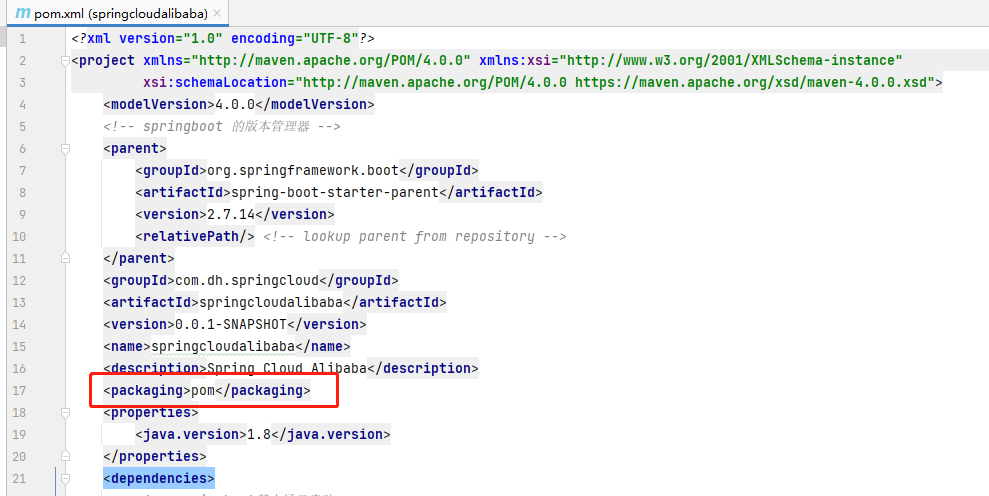
1.1 创建基于SpringBoot的父工程
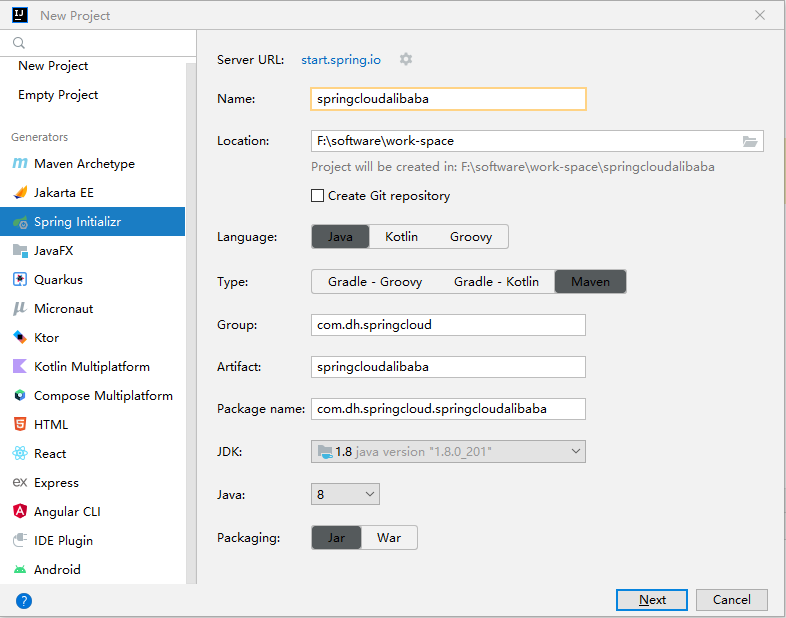
创建完成之后修改 pom.xml 文件,加上 <packaging>pom</packaging>
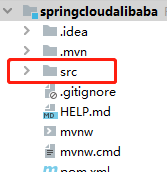
父工程的 src 目录我们也不需要用到,所以可以删除
1.2 创建两个子模块(订单模块和库存模块)
1.2.1 创建子模块
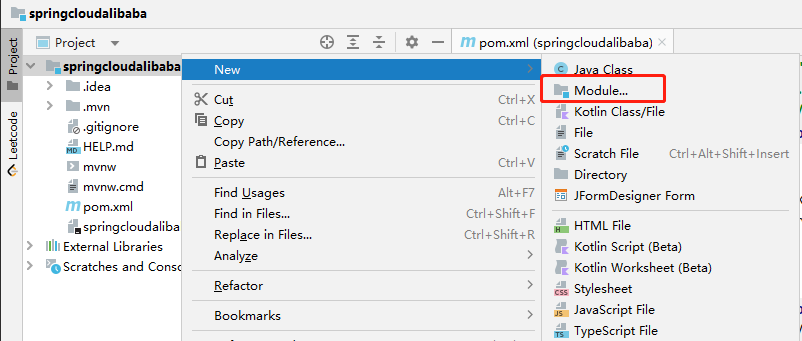

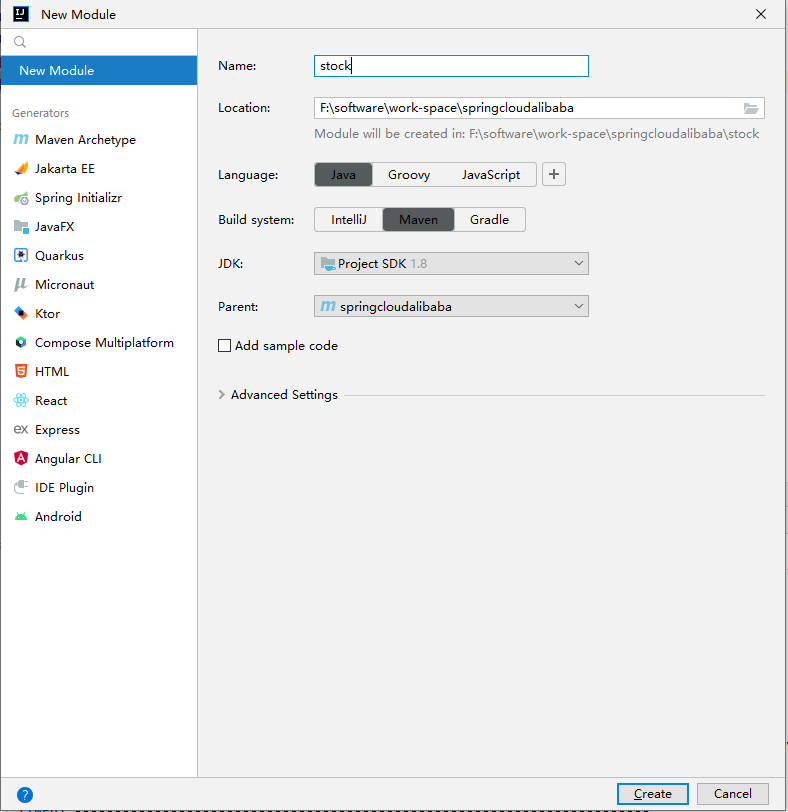
1.2.2 添加依赖
在 order 和 stock 两个子模块的 pom.xml 文件中添加如下依赖:
1 | <dependencies> |
1.3 在 order 模块中使用 RestTemplate 调用 stock 模块
1.3.1 添加SpringBoot启动类
1.3.1.1 order 模块
1 |
|
1.3.1.2 stock 模块
1 |
|
1.3.2 添加配置文件
在 resources 目录下添加 application.yml 文件
1.3.2.1 order 模块
1 | server: |
1.3.2.2 stock模块
1 | server: |
1.3.3 添加 Controller 接口
1.3.3.1 order模块
1 |
|
1.3.3.2 stock 模块
1 |
|
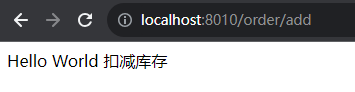
1.3.3.3 调用
运行 order 模块和 stock 模块,在浏览器中请求 http://localhost:8010/order/add
二、Spring Cloud Alibab 环境搭建
2.1 版本说明
最新版可以在此地址查看:https://github.com/alibaba/spring-cloud-alibaba/wiki/%E7%89%88%E6%9C%AC%E8%AF%B4%E6%98%8E
2.1.1 毕业版本依赖关系(推荐使用)
2.1.1.1 2022.x 分支
适配 Spring Boot 3.0,Spring Cloud 2022.x 版本及以上的 Spring Cloud Alibaba 版本按从新到旧排列如下表(最新版本用*标记): (注意,该分支 Spring Cloud Alibaba 版本命名方式进行了调整,未来将对应 Spring Cloud 版本,前三位为 Spring Cloud 版本,最后一位为扩展版本,比如适配 Spring Cloud 2022.0.0 版本对应的 Spring Cloud Alibaba 第一个版本为:2022.0.0.0,第个二版本为:2022.0.0.1,依此类推)
| Spring Cloud Alibaba Version | Spring Cloud Version | Spring Boot Version |
|---|---|---|
| 2022.0.0.0* | Spring Cloud 2022.0.0 | 3.0.2 |
| 2022.0.0.0-RC2 | Spring Cloud 2022.0.0 | 3.0.2 |
| 2022.0.0.0-RC1 | Spring Cloud 2022.0.0 | 3.0.0 |
2.1.1.2 2021.x 分支
适配 Spring Boot 2.4,Spring Cloud 2021.x 版本及以上的 Spring Cloud Alibaba 版本按从新到旧排列如下表(最新版本用*标记):
| Spring Cloud Alibaba Version | Spring Cloud Version | Spring Boot Version |
|---|---|---|
| 2021.0.5.0* | Spring Cloud 2021.0.5 | 2.6.13 |
| 2021.0.4.0 | Spring Cloud 2021.0.4 | 2.6.11 |
| 2021.0.1.0 | Spring Cloud 2021.0.1 | 2.6.3 |
| 2021.1 | Spring Cloud 2020.0.1 | 2.4.2 |
2.1.1.3 2.2.x 分支
适配 Spring Boot 为 2.4,Spring Cloud Hoxton 版本及以下的 Spring Cloud Alibaba 版本按从新到旧排列如下表(最新版本用*标记):
| Spring Cloud Alibaba Version | Spring Cloud Version | Spring Boot Version |
|---|---|---|
| 2.2.10-RC1* | Spring Cloud Hoxton.SR12 | 2.3.12.RELEASE |
| 2.2.9.RELEASE | Spring Cloud Hoxton.SR12 | 2.3.12.RELEASE |
| 2.2.8.RELEASE | Spring Cloud Hoxton.SR12 | 2.3.12.RELEASE |
| 2.2.7.RELEASE | Spring Cloud Hoxton.SR12 | 2.3.12.RELEASE |
| 2.2.6.RELEASE | Spring Cloud Hoxton.SR9 | 2.3.2.RELEASE |
| 2.2.1.RELEASE | Spring Cloud Hoxton.SR3 | 2.2.5.RELEASE |
| 2.2.0.RELEASE | Spring Cloud Hoxton.RELEASE | 2.2.X.RELEASE |
| 2.1.4.RELEASE | Spring Cloud Greenwich.SR6 | 2.1.13.RELEASE |
| 2.1.2.RELEASE | Spring Cloud Greenwich | 2.1.X.RELEASE |
| 2.0.4.RELEASE(停止维护,建议升级) | Spring Cloud Finchley | 2.0.X.RELEASE |
| 1.5.1.RELEASE(停止维护,建议升级) | Spring Cloud Edgware | 1.5.X.RELEASE |
2.1.2 组件版本关系
每个 Spring Cloud Alibaba 版本及其自身所适配的各组件对应版本如下表所示(注意,Spring Cloud Dubbo 从 2021.0.1.0 起已被移除出主干,不再随主干演进):
| Spring Cloud Alibaba Version | Sentinel Version | Nacos Version | RocketMQ Version | Dubbo Version | Seata Version |
|---|---|---|---|---|---|
| 2022.0.0.0 | 1.8.6 | 2.2.1 | 4.9.4 | ~ | 1.7.0 |
| 2022.0.0.0-RC2 | 1.8.6 | 2.2.1 | 4.9.4 | ~ | 1.7.0-native-rc2 |
| 2021.0.5.0 | 1.8.6 | 2.2.0 | 4.9.4 | ~ | 1.6.1 |
| 2.2.10-RC1 | 1.8.6 | 2.2.0 | 4.9.4 | ~ | 1.6.1 |
| 2022.0.0.0-RC1 | 1.8.6 | 2.2.1-RC | 4.9.4 | ~ | 1.6.1 |
| 2.2.9.RELEASE | 1.8.5 | 2.1.0 | 4.9.4 | ~ | 1.5.2 |
| 2021.0.4.0 | 1.8.5 | 2.0.4 | 4.9.4 | ~ | 1.5.2 |
| 2.2.8.RELEASE | 1.8.4 | 2.1.0 | 4.9.3 | ~ | 1.5.1 |
| 2021.0.1.0 | 1.8.3 | 1.4.2 | 4.9.2 | ~ | 1.4.2 |
| 2.2.7.RELEASE | 1.8.1 | 2.0.3 | 4.6.1 | 2.7.13 | 1.3.0 |
| 2.2.6.RELEASE | 1.8.1 | 1.4.2 | 4.4.0 | 2.7.8 | 1.3.0 |
| 2021.1 or 2.2.5.RELEASE or 2.1.4.RELEASE or 2.0.4.RELEASE | 1.8.0 | 1.4.1 | 4.4.0 | 2.7.8 | 1.3.0 |
| 2.2.3.RELEASE or 2.1.3.RELEASE or 2.0.3.RELEASE | 1.8.0 | 1.3.3 | 4.4.0 | 2.7.8 | 1.3.0 |
| 2.2.1.RELEASE or 2.1.2.RELEASE or 2.0.2.RELEASE | 1.7.1 | 1.2.1 | 4.4.0 | 2.7.6 | 1.2.0 |
| 2.2.0.RELEASE | 1.7.1 | 1.1.4 | 4.4.0 | 2.7.4.1 | 1.0.0 |
| 2.1.1.RELEASE or 2.0.1.RELEASE or 1.5.1.RELEASE | 1.7.0 | 1.1.4 | 4.4.0 | 2.7.3 | 0.9.0 |
| 2.1.0.RELEASE or 2.0.0.RELEASE or 1.5.0.RELEASE | 1.6.3 | 1.1.1 | 4.4.0 | 2.7.3 | 0.7.1 |
2.2 本项目中使用的版本
- Spring Boot:2.7.14
- Spring Cloud:2021.0.5
- Spring Cloud Alibaba:2021.0.5.0
2.3 在父工程中添加 Spring Cloud Alibab依赖
因为我们之前已经添加过SpringBoot管理器,所以不能再使用这种方式来添加 Spring Cloud Alibaba 的管理器
1 | <parent> |
可以采用如下方式,在父工程的 pom.xml 文件中添加如下内容:
1 | <dependencyManagement> |
也可以把 SpringBoot 的管理器也放在这里面,再加上 Spring Cloud 的版本管理,最终写法如下:
1 | <dependencyManagement> |
三、Alibaba 微服务组件 Nacos 注册中心
3.1 什么是 Nacos
官方:一个更易于构建云原生应用的动态服务发现(Nacos Discovery)、服务配置(Nacos Config)和服务管理平台。
集 注册中心+配置中心+服务管理 平台
Nacos 的关键特性包括:
- 服务发现和服务健康监测
- 动态配置服务
- 动态 DNS 服务
- 服务及其元数据管理
3.2 核心功能
- 服务注册:Nacos Client 会通过发送 REST 请求的方式向 Nacos Server 注册自己的服务,提供自身的元数据,比如 ip 地址、端口等信息。Nacos Server 接收到注册请求后,就会把这些元数据信息存储在一个双层的内存 Map 中。
- 服务心跳:在服务注册后,Nacos Client 会维护一个定时心跳来持续通知 Nacos Server,说明服务一直处于可用状态,防止被剔除。默认 5s 发送一次心跳。
- 服务同步:Nacos Server 集群之间会相互同步服务实例,用来保证服务信息的一致性。 leader raft
- 服务发现:服务消费者(Nacos Client)在调用服务提供者的服务时,会发送一个 REST 请求给 Nacos Server,获取上面注册的服务清单,并且缓存在在 Nacos Client 本地,同时会在 Nacos Client 本地启动一个定时任务定时拉取服务端最新的注册表信息更新到本地缓存。
- 服务健康检查:Nacos Server 会开启一个定时任务用来检查注册服务实例的健康情况,对于超过 15s 没有收到客户端心跳的实例会将它的 healthy 属性置为 false(客户端服务发现时不会发现),如果某个实例超过 30s 没有收到心跳,直接剔除该实例(被剔除的实例如果恢复发送心跳则会重新注册)。
3.3 Nacos Server 单机部署
3.3.1 下载
3.3.1.1 下载源码编译
源码下载地址:https://github.com/alibaba/nacos
1 | cd nacos |
3.3.1.2 下载安装包
下载地址:https://github.com/alibaba/nacos/releases
3.3.2 启动 Nacos Server
此处以 Windows 为例,双击 startup.cmd 运行
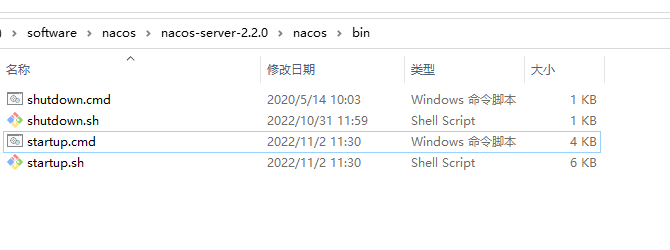
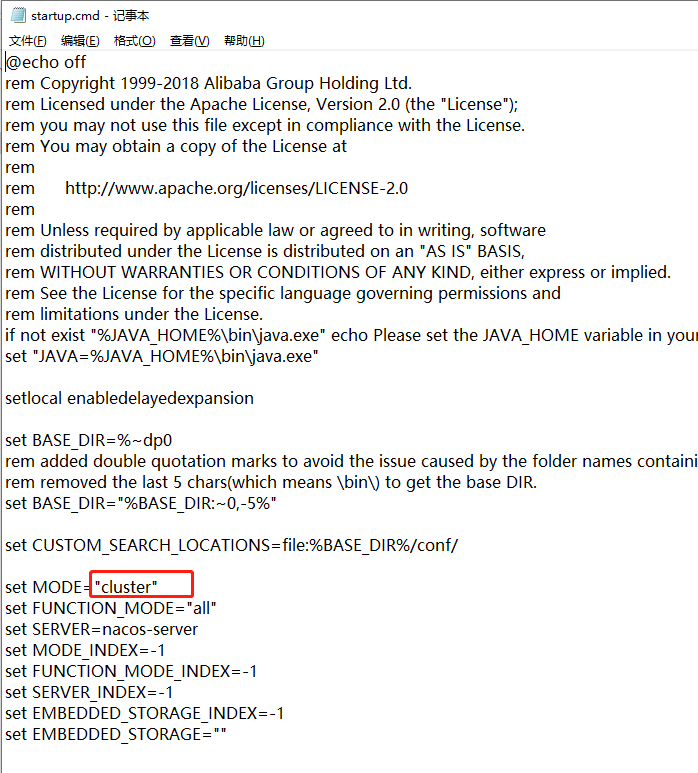
但是默认是集群模式,此处我们先将其改成单机模式再运行,编辑 startup.cmd ,将下面的 cluster 修改为 standalone
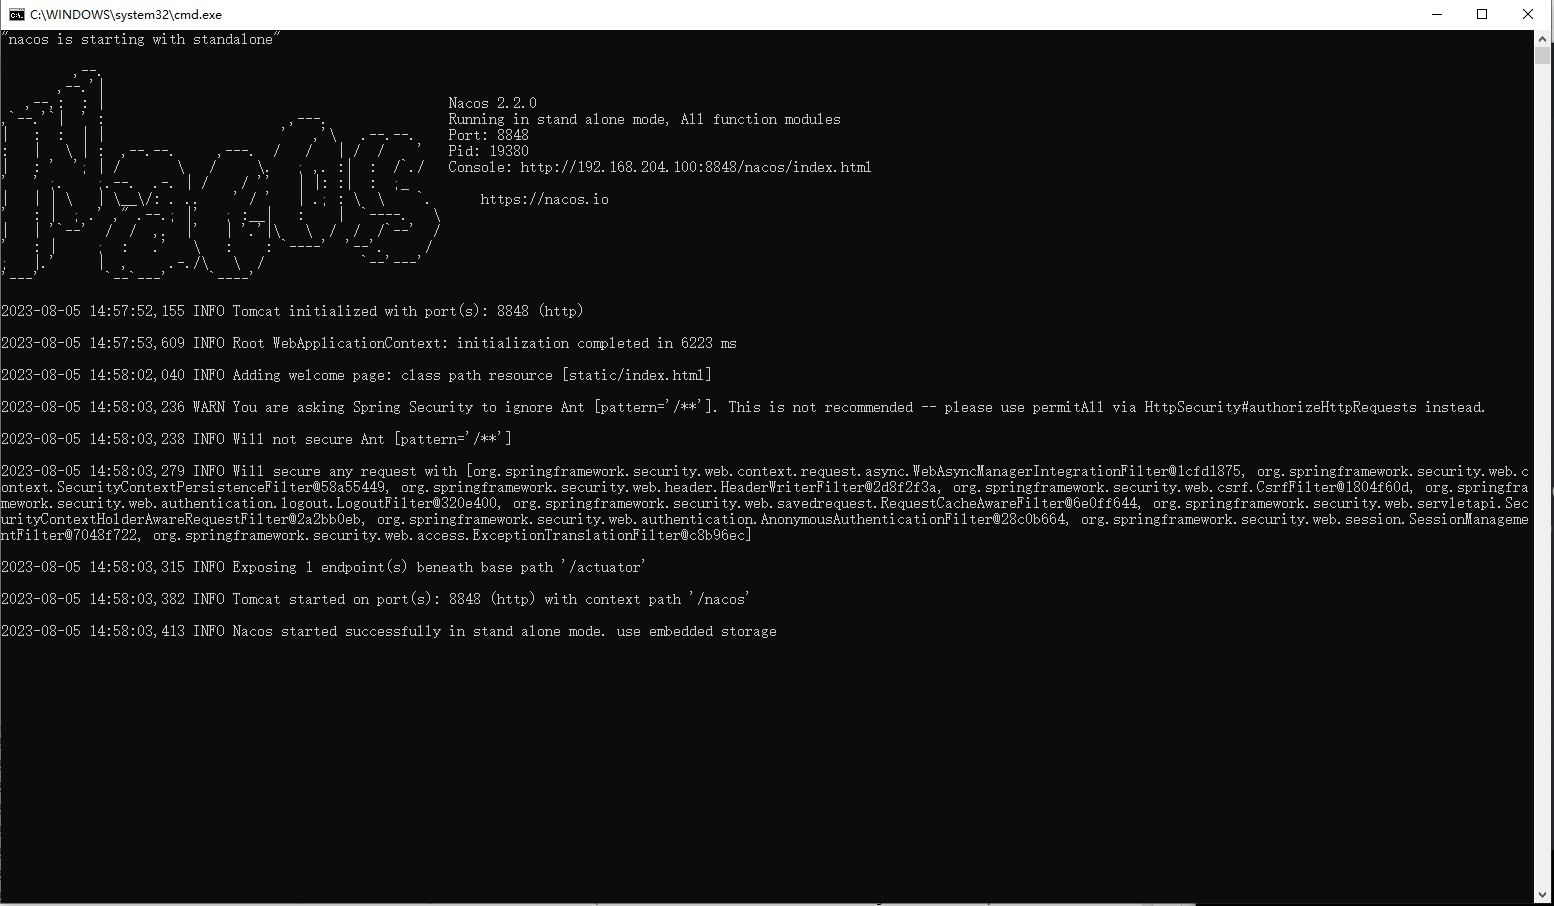
双击 startup.cmd,看到如下输出代表启动成功
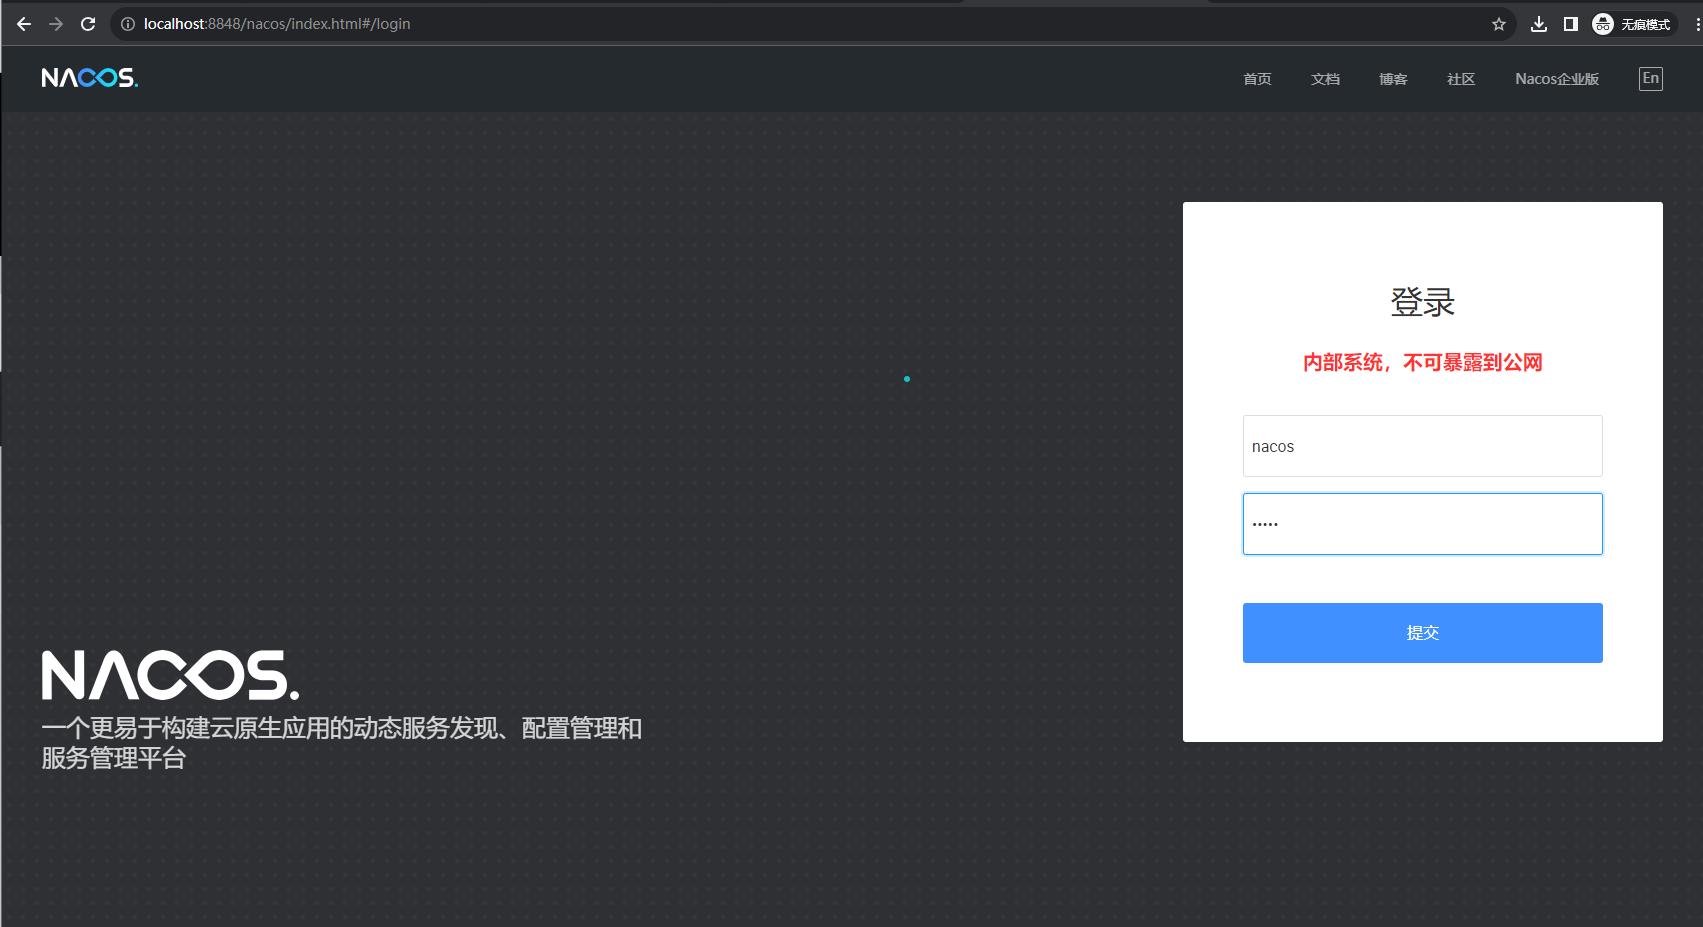
访问 http://localhost:8848/nacos/index.html 即可登录 web 控制台。默认的用户名和密码都是 nacos
3.4 搭建 Nacos Client
3.4.1 修改之前创建的项目
为了不影响我们之前创建的两个子模块,我们在这里重新创建这两个模块。
复制之前创建的 order 和 stock 两个模块,分别复制为 order-nacos 和 stock-nacos,并做一些修改。
修改两个模块的 pom.xml 文件,将 artifactId 分别修改为 <artifactId>order-nacos</artifactId> 和 <artifactId>stock-nacos</artifactId>
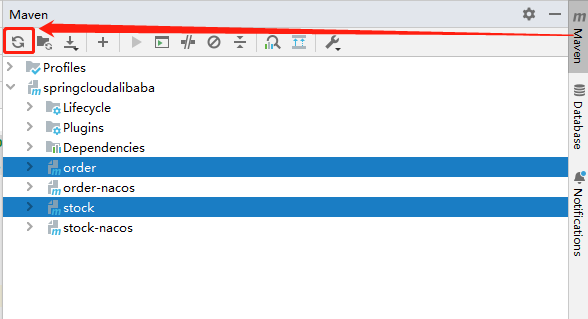
然后在父工程的 pom.xml 文件的 <modules> 下添加两个 module:<module>order-nacos</module> 和 <module>stock-nacos</module>
然后点击 Maven,刷新一下即可
3.4.2 引入 nacos-discovery 依赖
3.4.2.1 添加依赖
在 order-nacos 和 stock-nacos 的 pom.xml 文件中添加 nacos-discovery 的依赖:
1 | <!-- nacos 服务注册发现 --> |
3.4.2.2 修改配置文件
在 application.yml 文件中添加相关配置。
order-nacos:
1 | server: |
stock-nacos:
1 | server: |
3.4.2.3 常见配置项
| 配置项 | Key | 默认值 | 说明 |
|---|---|---|---|
服务端地址 |
spring.cloud.nacos.discovery.server-addr |
无 |
Nacos Server 启动监听的ip地址和端口 |
服务名 |
spring.cloud.nacos.discovery.service |
${spring.application.name} |
给当前的服务命名 |
服务分组 |
spring.cloud.nacos.discovery.group |
DEFAULT_GROUP |
设置服务所处的分组 |
权重 |
spring.cloud.nacos.discovery.weight |
1 |
取值范围 1 到 100,数值越大,权重越大 |
网卡名 |
spring.cloud.nacos.discovery.network-interface |
无 |
当IP未配置时,注册的IP为此网卡所对应的IP地址,如果此项也未配置,则默认取第一块网卡的地址 |
注册的IP地址 |
spring.cloud.nacos.discovery.ip |
无 |
优先级最高 |
注册的端口 |
spring.cloud.nacos.discovery.port |
-1 |
默认情况下不用配置,会自动探测 |
命名空间 |
spring.cloud.nacos.discovery.namespace |
无 |
常用场景之一是不同环境的注册的区分隔离,例如开发测试环境和生产环境的资源(如配置、服务)隔离等。 |
AccessKey |
spring.cloud.nacos.discovery.access-key |
无 |
当要上阿里云时,阿里云上面的一个云账号名 |
SecretKey |
spring.cloud.nacos.discovery.secret-key |
无 |
当要上阿里云时,阿里云上面的一个云账号密码 |
Metadata |
spring.cloud.nacos.discovery.metadata |
无 |
使用Map格式配置,用户可以根据自己的需要自定义一些和服务相关的元数据信息 |
日志文件名 |
spring.cloud.nacos.discovery.log-name |
无 |
|
集群 |
spring.cloud.nacos.discovery.cluster-name |
DEFAULT |
配置成Nacos集群名称 |
接入点 |
spring.cloud.nacos.discovery.enpoint |
UTF-8 |
地域的某个服务的入口域名,通过此域名可以动态地拿到服务端地址 |
是否集成Ribbon |
ribbon.nacos.enabled |
true |
一般都设置成true即可 |
是否开启Nacos Watch |
spring.cloud.nacos.discovery.watch.enabled |
true |
可以设置成false来关闭 watch |
注册的IP地址类型 |
spring.cloud.nacos.discovery.ip-type |
IPv4 |
可以配置IPv4和IPv6两种类型 |
3.4.3 运行
运行 order-nacos 和 stock-nacos,然后查看 nacos 的 web 控制台,可以看到这两个服务:

3.4.4 改造 order-nacos 调用 stock-nacos 的方式
3.4.4.1 给 order-nacos 添加负载均衡
这一步很重要,因为不添加负载均衡的话是无法调用其他服务的
1 | <!-- 高版本的不使用Netflix了,所以不用Ribbon来实现负载均衡,因此需要添加负载均衡的依赖 --> |
修改 order-nacos 启动类中的 RestTemplate,在 RestTemplate 上添加 @LoadBalanced 注解。
1 |
|
3.4.4.2 修改 order-nacos 模块的 OrderController 类中的 add 方法:
将 stock-nacos 的服务地址修改为服务名 stock-service
1 |
|
重启 order-nacos 服务,再次请求 http://localhost:8010/order/add,也可以请求成功。
3.5 Nacos Server 集群部署
下面介绍在 Linux 上安装 Nacos Server 并搭建集群的步骤。
3.5.1 下载Nacos Server
下载地址:https://github.com/alibaba/nacos/releases/download/2.2.0/nacos-server-2.2.0.tar.gz
3.5.2 安装 Nacos Server
将下载好的安装包上传到 /opt/nacos 目录
1 | cd /opt/nacos |
3.5.3 修改配置文件
以 nacos8849 为例,进入 nacos8849 目录。修改 conf/application.properties 文件的配置,使用外置数据源,要使用 mysql5.7+
1 | # web 服务端口 |
nacos8851 和 nacos8853 中也作相同修改,注意 server.port 要对应修改。
3.5.4 修改 cluster.conf
将 conf/cluster.conf.example 复制为 conf/cluster.conf ,添加节点配置
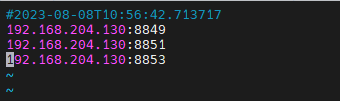
nacos8849、nacos8851 和 nacos8853 的此文件都是相同的。
3.5.5 创建 MySQL 数据库
3.5.5.1 安装 MySQL
如果还未安装 MySQL,可以参考以下在 docker 中安装 MySQL的步骤:
1 | 拉取 MySQL 镜像,不加版本号默认下载 latest 版本,即 docker pull mysql:latest |
命令说明:
-p 3306:3306
将宿主机的 3306 端口映射到 docker 容器的 3306 端口,格式为:主机(宿主)端口:容器端口--name mysql
运行服务的名字-v /opt/docker/mysql/conf:/etc/mysql/conf.d
将宿主机/opt/docker/mysql目录下的/conf挂载到容器的/etc/mysql/conf.d-v /opt/docker/mysql/logs:/logs
将宿主机/opt/docker/mysql目录下的/logs目录挂载到容器的/logs-v /opt/docker/mysql/data:/var/lib/mysql
将宿主机/opt/docker/mysql目录下的/data目录挂载到容器的/var/lib/mysql-e MYSQL_ROOT_PASSWORD=123456
初始化root用户的密码为123456-d mysql:latest
后台程序运行mysql
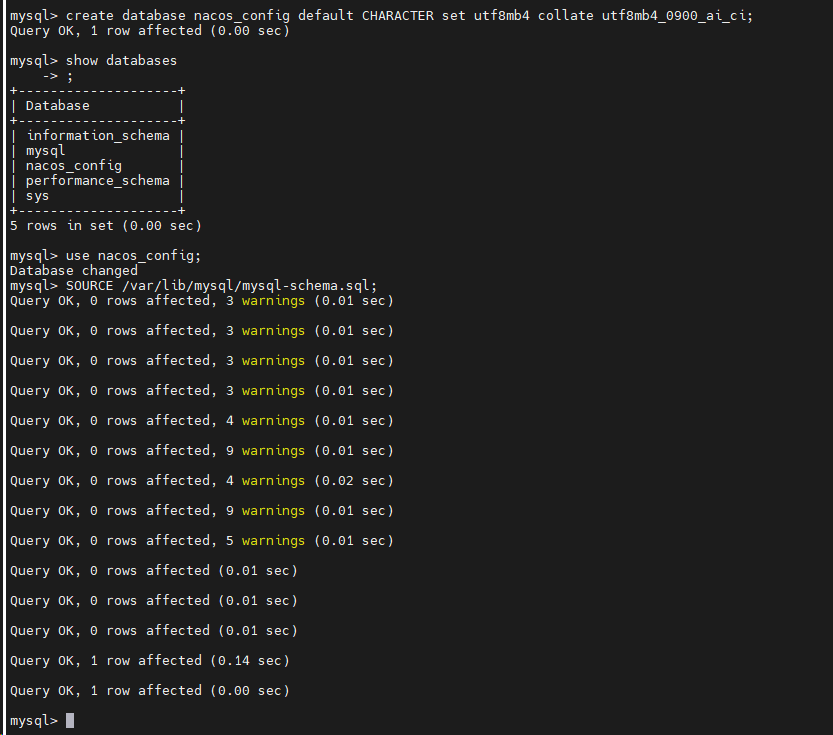
3.5.5.2 创建数据库表
1 | 进入 MySQL 容器 |
3.5.6 如果出现内存不足,修改启动脚本JVM参数
1 | JAVA_OPT="${JAVA_OPT} -server -Xms512m -Xmx512m -Xmn256m -XX:MetaspaceSize=64m -XX:MaxMetaspaceSize=128m" |
3.5.7 启动 nacos
1 | 进入启动程序所在目录 |

在 nacos8851 和 nacos8853 中也执行相同的操作.
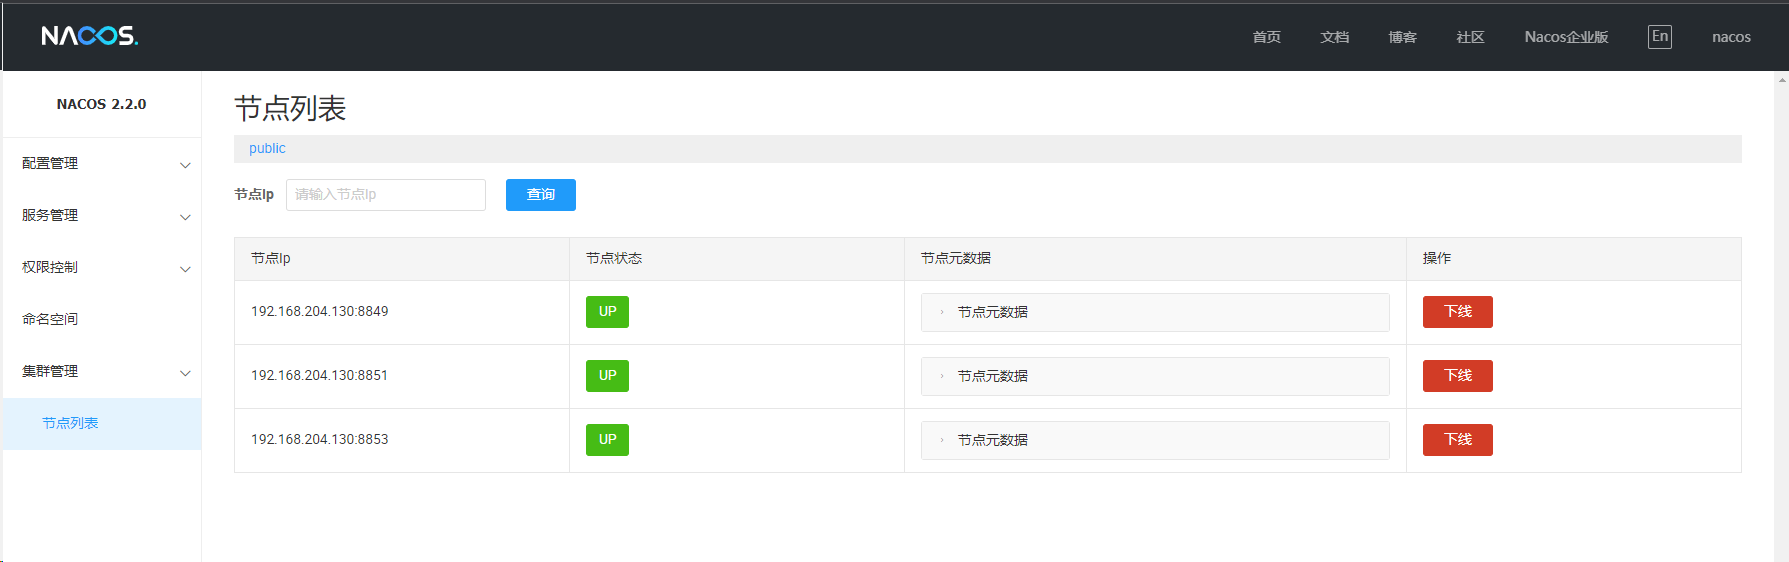
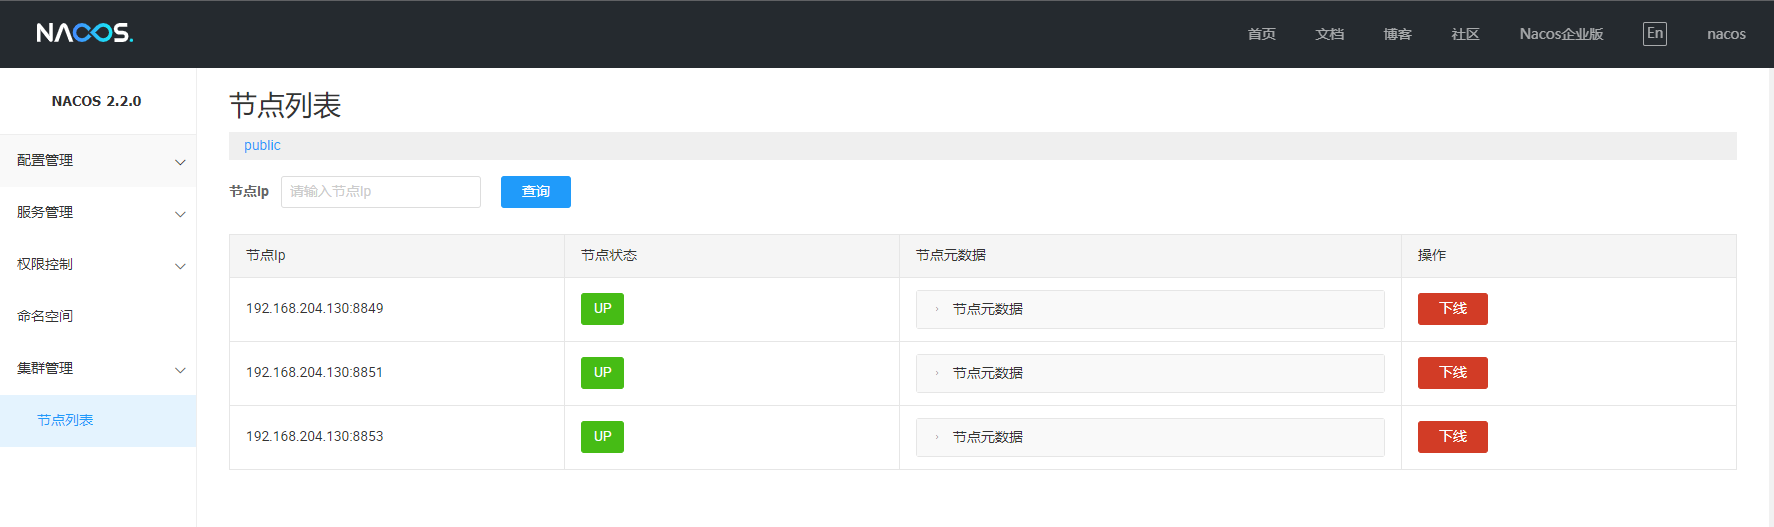
启动完毕后,登录任一节点的 web 控制台,可以看到集群中的所有节点。
3.5.8 使用 nginx 访问 nacos 集群
现在集群已经搭建完成,但是我们去访问节点的时候还是通过各个节点的 ip 去访问的,这显然不合适,所以我们需要使用一个 ip 就能访问到各个节点,这里我们通过 nginx 来实现。
3.5.8.1 安装 nginx
1 | ------ 安装 nginx 依赖 |
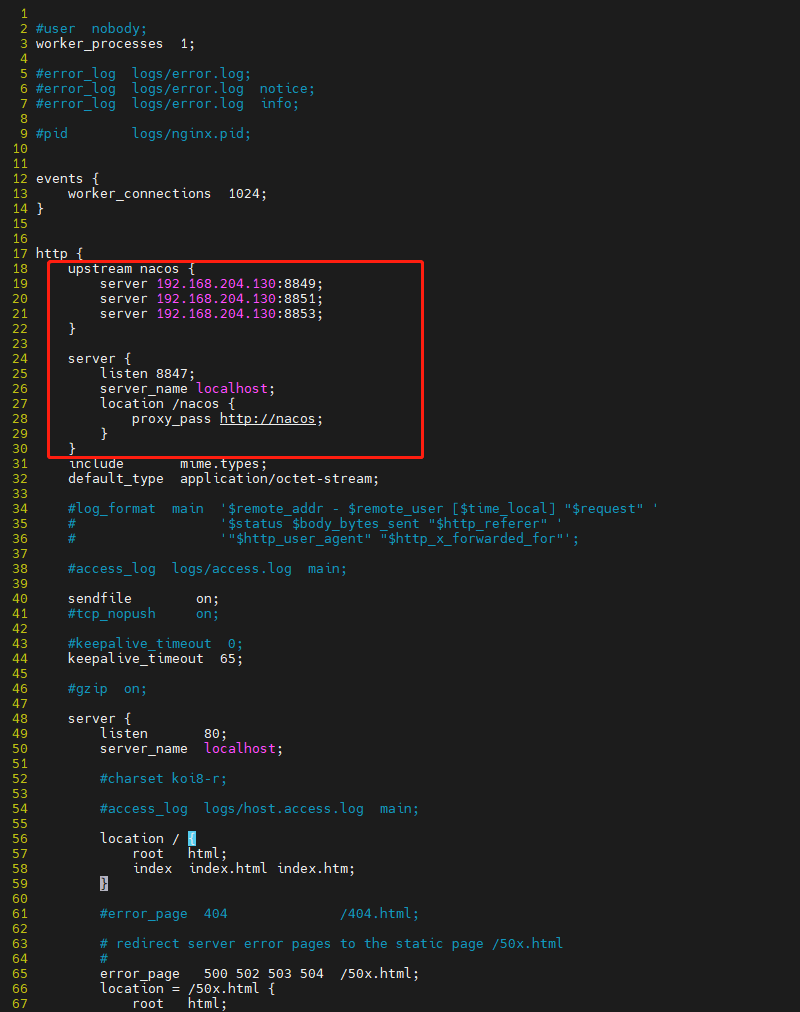
3.5.8.2 编辑 nginx 配置文件
vim /usr/local/nginx/conf/nginx.conf
1 | upstream nacos { |
3.5.8.3 启动 nginx
1 | cd /usr/local/nginx/sbin |
访问 ip:8847/nacos ,也能正常看到集群中的各个节点。